Tuesday 18 February 2014

Soft Grey Smokes

If you know me, you know i love my smokes. Heh. Today's look is something softer for day time. I have brown eyes [duh] so I think I can get away with wearing darker shadows during the day. That being said, I think anyone could get away with this look in the day time. I just have some friends with lighter eyes who think dark shadows are a bit much for an everyday basis. NOT ME, MY FRIENDS. NOT ME. ~warning~ This look is really easy. Like stupid easy. It's one of those go-to looks for me to just slap on my face that's kinda messy but not at the same time. And I'm all about that.  Enough shenanigans, let's get started. Also ignore my eyebrows in these posts. I missed a spot, try not to let it ruin your day, considering I can't do much about it now.


Blank canvas. I've got no concealer under the eyes yet because if you go a little crazy with the eyeshadow, which I tend to do often, you can use it to clean up the edges. I also have a bit of Mac's Soft Ochre Paint Pot on the lids as a primer. 


Next I go in Maybelline Colour Tattoo in Tough as Taupe to give the shadow's something to stick to and really just to give them an extra "oomph" if you knowhatimsayin. Any flat shader brush will do to apply it, you can even use your fingers, I'm not gonna tell you how to live your life. 


The next step is to add a medium grey shadow over the cream base. I used the Too Faced Naked Eye Palette and the shade Like a Virgin, with that same shitty shader brush. Slap it on there, doesn't need to be perfect. 


Here I'm using Mac Haux eyeshadow, which I always like to pronounce "hoe" cause I'm 5 years old. I'm using a Bdellium tools blending brush similiar to the Mac 217 and adding it into the crease is small circular motions. Hard to really capture in photos but you catch my drift. Haux is really cool toned and it was basically the perfect crease colour with the cool toned grey, slightly purple so it adds some depth without being too dark and obnoxious. 


I use a clean MAC 224 (clean as in no added product) and blend that baby out. If I were wearing this on a night out I'd probably add a darker colour in the outer corner but that's why this is a soft grey smoke. Essentially this look is pretty easily transitioned from day to nighttime. 


Then I go in with some Mac Prolongwear Concealer in NC20. Apply it with my fingers and then use my RT Expert Face Brush to "tap" it into the skin. Swiping creates streaks and I find allows the concealer to settle into fine lines. You end up using more product and looking cakey- ewh. 


Take a pencil brush and add some of that grey shadow under the lash line. I personally love doing this because it creates a shadow and the illusion that your bottom lashes are so long they cast shadows. Plus I find it really pulls everything together and it's kinda grungey so I dig it. 


Liner and mascara and the eyes are donezo. I have Stila Stay Allday Waterproof Liquid Eyeliner in Intense Black and Mac Haute and Naughty Marscara in Black on. I don't really like this liner anymore cause it's shiny as hell. If anyone can recommend me a MATTE liquid liner I would be forever grateful. I added some Essence grey eyeliner in the water line as well.


Littttttle bit of blush and bronzer and you're good to go. I'm using a Rimmel bronzer I can't for the life of me figure out what its called but when you see it, you'll know it. I reccomend keeping the cheeks/lips pink as it's really flattering with the greys on the eyes. I used Nars 'Love' blush from the new Final Cut collection for spring. Ideas for lip colours I included are Mac's Angel lipstick which is my favourite pink of all time, or Mac Rose Lily from the new spring line which is a nice, cool toned sheer pink. I opted for this one to wear with the look today.


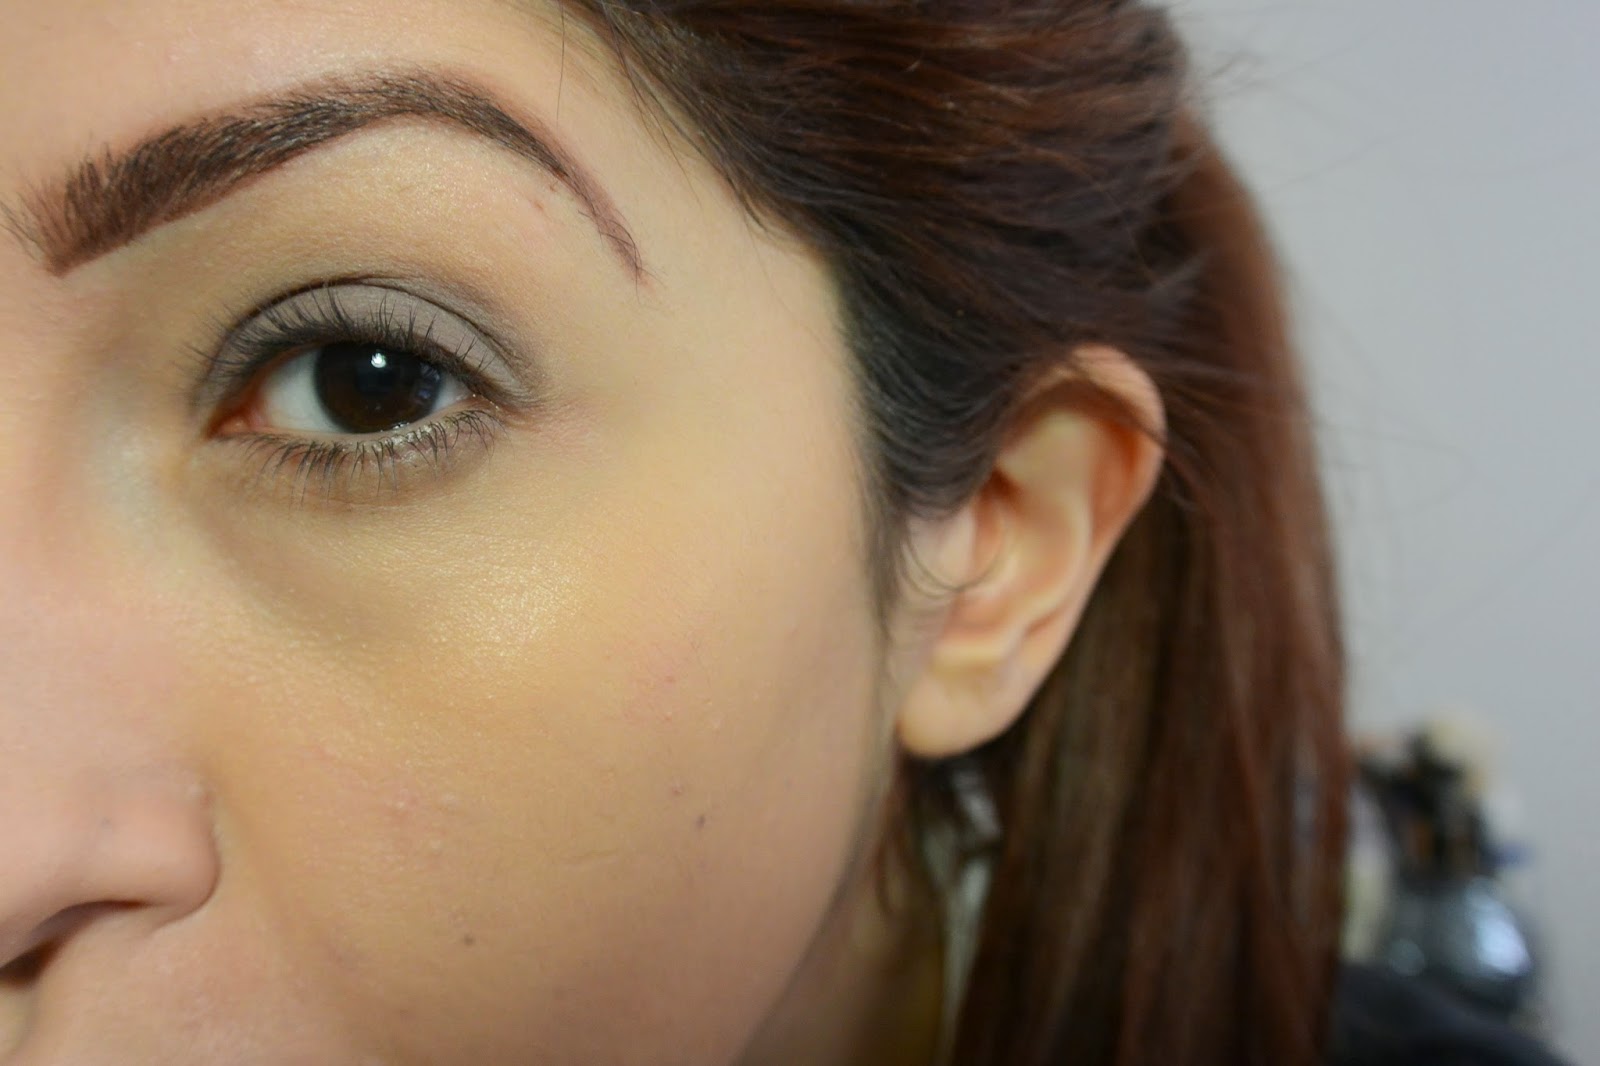
~close ups of the eyes~


All the products used in this look :) This part is still kinda awkward for me. I'm gotta get a white sheet and use natural lighting and make that shit look fancy. Thanks for reading guys and leave me any comments if you have any questions or suggestions. Peeeeeace out 

Friday 7 February 2014

Eyebrow, You brow...

That was cheesy. Anyways, Hi everybody. I'm at it again. Giving this beauty blog thing another shot. Today's post is ~all about eyebrows~ because I personally believe they are crucial. Even if you're someone who doesn't wear much makeup, it's really important to have well groomed eyebrows because they really are the focal point of your face. This is just my everyday routine that I've been doing lately. Feel free to soften them up a bit to your taste because I do like quite a strong brow. Let's get into it, shall we? First things first, let's talk about the products I'll be using today: 


Starting from the top left we've got Anastasia Beverly Hills Dipbrow in the shade Auburn, Anastasia Beverly Hills Brow Powder Duo in Auburn, Anastasia Beverly Hills Clear Brow Gel, Mac's 266 Brush, an angled brush from Essence Beauty, and some Crown Brush spooly I got at Imats. 

I use the cheapy angled brush for the dip brow so I don't have to get that stuff on my good brushes, not that it's difficult to clean off or anything it's just me being anal ol' me. I use Auburn because my hair is, get this, Auburn. I know right? Wild. Never_would_have_thought. My natural hair colour and brow colour are darker than my hair is so the dip brow really helps lighten my brows and match them to my current hair colour. You could do this with a pencil, lighter powder and a tinted brow gel if you wish. This is just what works for me. 


LMFAO. Sorry, I look so serious I can't help but laugh. Okay back to business. I usually do my foundation before my brows so that's exactly what I did here. This is because if I did my brows first, my foundation gets all over them and basically messes up all my hard work. When I apply my foundation (and eyeprimer) I tend to go over my brows a bit, just to kind of give the brow products something to stick to. I also feel like it gives me a 'blank canvas' of sorts. This eyebrow I used to have pierced, if you can tell from my scar. So the ends are reaaaallly sparse. Such is life.


First thing I do is take my dipbrow onto my cheapy angle brush and basically create a line along the base of the brow. This looks scary as at first but don't worry, we're gonna blend that shit upwards. Using your brush with NO ADDITONAL PRODUCTED ADDED use short strokes to "push" the product up the brow. This was really hard to capture taking a picture, but the second photo is what it should look like after you've blended upwards. 


Next I take my Mac 266 and some of the lighter shade in the brow duo and kind of go over the sparser areas of my brow. I like using both the gel/cream and powder combo because I find it gives a more 'natural' finish mixing the textures. Plus I think the DipBrow itself is on the shinier side, so I like to matte it out a bit with the powder. Again I start at the base of the brow and feather upwards. I never really like to make a harsh line near the top because this is a really obvious way of saying HEY I DRAW ON MY BROWS. 


Last but not least I go over them with some brow gel to keep everything neat and tidy. I personally prefer wax to gel but this was all I had on hand at the moment. The ends aren't perfect but that's because of my scar.

Anyways I hope this was informative and if you have any comments, questions or concerns please feel free to let me know :) and any requests for future posts are welcome! Thanks everybody, have a great weekend!